Well this certainly took a while, but I've finally got MacOS X working on my HP Pavilion dv2056ea laptop! MacOS X installs fine using the Kalyway 10.5.1 install disc, but a few things were missing.
Firstly, no network. No LAN, no WAN! A bit of research here tells me my network card (Intel Pro 100VE) will work (with some editing of a kext file), but the wireless card (Intel Wireless 3945ABG) has no support. I've found that a
driver is in the making, but it's far from finished. This annoyed me slightly, but more on that later.
Another thing, no battery meter. What good is it if I can't see how much charge is left on my battery?!?!? Luckily I found
a post that had a version of PowerManagement.bundle that enables the battery meter for my laptop. Yay!
The next thing I noticed was I had no sound. Well, to be more specific, no sound from the internal speakers. Audio from the headphones was ok (volume should be set lowish otherwise it distorts - something I've found with linux on this laptop too). As I rarely use the internal speakers, I'm fine with them not working. Hopefully a fix will appear for this soon as
a lot of work has already been done on this.
You may be pleased to know that the graphics worked fine using the nvidia drivers that came on the Kalyway install disc.
Ok, now back to the wireless card issue. So no proper drivers have been made. I'd read on forums that a lot of people had replaced the intel cards with broadcom ones. So I started reading into this.
From what I've found out, HP, Compaq and IBM follow some stupid requirement set down by various regulatory organizations, that says they must restrict what wireless devices can be put in to the laptop! I stumbled across
this HP forum discussion, which states kind of why the BIOSLock is there. Scroll about half way down and find a post by Philip Doragh which is a reply to a user, MiSp.
Ok, so there's a high possibility my laptop has some kinda restriction on which wireless cards can be put into it. I must add at this point that the wireless cards I'm talking about are
Mini PCI Express cards. Not PCMCIA, Cardbus or ExpressCard ones.
So I decided to see exactly what I have in my laptop, an Intel Wireless 3945ABG Mini PCI Express card (Rev.2). I happen to have (at work) a Toshiba with the same model card (also Rev.2). So thinking these cards MUST be identical, I put the Toshiba card into my HP and switched it on. This is what I saw:
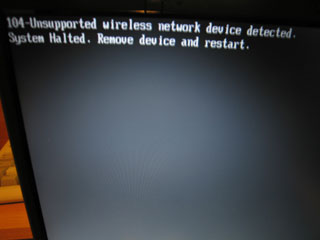
104-Unsupported wireless network device detected. System Halted. Remove device and restart.
"Great" I thought. So these two cards, that on paper, are the same, are infact different.
After a little research it turns out that the cards have Vendor, Device and SubSystem ID codes in them. Looking at their properties in device manager, it turns out both had the same Vendor and Device ID's (Ven: 8086 - Device: 4222), but the SubSystem ID's where different.
To cut a long story a little shorter, I found
this page of someone else having the same problem. I did basically the same thing, but had a few issues along the way. Here's what happened, my issues, and how I fixed them.
- Find Phoenix Bios Editor Pro (it's not free) - Find it on this blog (this guy has hacked his hp too).
- Get the latest BIOS for your laptop but don't install it. UK dv2056ea is here.
- Unpack the contents to a folder using WinRAR or a similar program that can unpack compressed exe's.
- You should find a file called 'WFLASH.EXE'. Run this, it will start the program, but not flash the bios yet. Part of it running will backup your existing bios to a file called BIOS.BAK. We need this file. Once it's backed up it will then ask you if you want to flash you bios. Click No.
- Now use a file chopping utility or hex editor to chop off all contents after 100000h of your backup bios file (BIOS.BAK). You should have a file of 1024k (1048576 bytes). Keep the reminder (chopped off part) in a separate file - we'll need it later.
- Install Phoenix Bios Editor Pro and open up the chopped bios file.
- Once the bios has been loaded, go to the directory where Bios Editor is installed. In there you should find a directory called TEMP. This is where your decompressed bios image is.
- Using a good file searching tool, look for the files containing your cards Vendor ID and Device ID. Mine were Ven: 8086 and Dev: 4222 so I searched for files with the following hex sequence: 86 80 22 42. This came up with a few results. So I then searched for the SubSys ID (135c103c) in reverse (3c 10 5c 13) within the results. It came up with just one file - MOD_5100.ROM.
- Using a decent HEX editor now search this file for the same reverse hex sequences as above. So first search for 86 80 22 42. Found @ f2b6h - this may differ to yours depending on what bios version you have installed. In the section you find this, you should see a few other Vendor and Device ID's in reverse. Like E414 1143 (Ven: 14E4 Dev: 4311 - Broadcom 4311). After these should FF FF FF FF followed by a list of SubSystem ID's. These are then followed by FF FF FF FF.
- Hex edit these codes correctly (remember all ID's are in reverse). Save your edited hex files as the same name.
- Back in Phoenix Bios Editor, make a minor change and change it back (eg. add a space to an error message and then remove the space). This should then give you the option to build the bios. It will ask you where to save it and name it. Save it in the winphlash directory of the HP bios download you extracted earlier.
- Now create a new file containing your edited and resaved bios and the chopped off section. Do this easily by entering "copy /b bios.wph + chopped.file newbios.wph" at the command prompt that's in the same directory as all the needed files.
- The new bios file you've created should be renamed to that of the same name as the new HP bios update (rename the existing one).
- Run WFLASH.EXE again. It should attempt to backup your bios again and then ask if you wish to flash with the new file. It should list bios revisions for the current bios and the new bios. They should be exactly the same as we've been editing your current bios.
If all goes to plan, you should have no more 104 errors for the card you have entered the Device, Vendor and SubSystem ID's for. I hope this helps someone out there...